We decided to design, cut, emboss, print, and assemble these entirely ourselves. Let me just say that it was an INCREDIBLE cost saver, but we got WAY overambitious and it ended up taking a looooooooooong time. I can't say it wasn't worth it, but it was a source of stress for awhile. =) So I don't really recommend this to anyone else.. but I do think our invitations kicked ass!
Before I start, a quick overview and retrospective:
1) We bought our raw paper supplies from Kelly Paper - I can't recommend them enough. They have these awesome warehouses where you can go in and feel/see the paper for yourself, and buy samples to take home. Their prices are unbeatable - I got 250 sheets of Astrobrights cover weight paper for $13!! You really can't beat that. So we bought all our paper here.
2) Be aware of the weight/size of your invitation! USPS charges different rates if something's square or over 1 ounce. I was able to use the regular 44 cent stamps out of pure luck - we were just below the limit and had decided to go with regular #10 envelopes (albeit in a bright color for variety).
3) Use colored paper wisely. It'll change the color of your ink when printing and when embossing.
4) Be aware of the fact that people rip envelopes and throw away invitations almost immediately. My heart was crushed when one of my roommates had got back from a Saturday wedding of a close friend, and by Sunday the invitation was already in the trash. It convinced me not to spend the extra money on a nice vellum envelope and too fancy paper. Good for my budget!
5) Give yourself a loooot of time for the invitations. They're more time-consuming than you think, even if you take an easier route!
The high level walkthrough of what we did:
1) Cut and folded our own pocketfolds. They're really expensive to buy, but super easy (and tedious) to fold yourself!
2) Created our own graphics. My bridesmaid designed these for us off a fire/water theme.
3) Created our own custom rubber stamps. My bridesmaid works at a company that has a laser cutting printer, so she had stamps made out of rubber for us, which was AMAZING! But we unfortunately cut the stamps too shallow into the rubber, so we ran into a lot of problems with ink smudges.
4) Embossed the designs. More on this later on the embossing walkthrough, but as fun as embossing is, it's also time-consuming (at least if you do it the way we did!)
--------------
Paper Supplies (all purchased from Kelly Paper): Cost total $78.27 (with a lot of extra to spare for table numbers, placecards, favor tags, thank you cards, and maybe even some extra to sell onto future brides)
1) 250 sheets of Astrobright 65# coverweight paper in lunar blue in 8.5 x 11" to cut up for the inserts
2) 17 sheets of Mohawk Via Vellum 80# coverweight paper in scarlet in 26 x 40" to cut up for the pocketfolds
3) 500 Astrobright smooth finish lunar blue envelopes in #10 (standard envelope size)
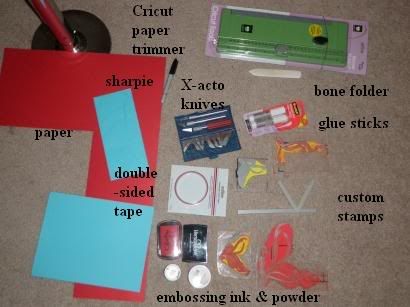
Tools: (purchased from Michaels and JoAnns)
1) Bone folder (OPTIONAL)
2) 1/4" doublesided tape
3) Ruler
4) Cricut portable paper trimmer with cutting and scoring blades
5) Color printer
6) Glue sticks
7) Sharpies & pencils
8) Patient and kind bridesmaids!
9) Scissors & exacto knife
Embossing Supplies:
1) Custom stamps
2) Red & blue embossing powder
3) Colorbox red pigment ink
4) Versamark watermark ink
5) Small brushes (to brush the extra powder off)
6) Tons of extra paper to catch embossing powder (hello, multitudes of Victoria's Secret catalogs!)
7) Heat gun
--------------
I took a lot of inspiration from many online resources, but the one that clinched it was Heather's DIY Pocketfolds walkthrough.
First I'll review how we made the pocketfolds. It's a bit long so I'll review the inserts and more embossing details in the next post.
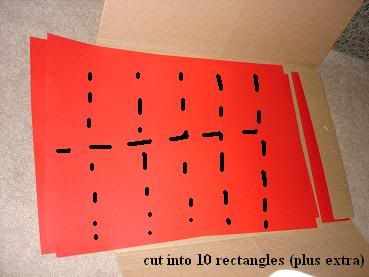
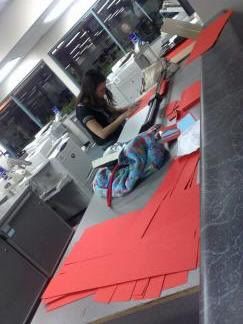
We started with the red paper for the pocketfolds, cutting it down from one huge 26 x 40" sheet to ten rectangles of 18.7 cm by 30.6 cm. (Sorry for the random unit switching! I just measured with whatever came out with a nicer measurement.) I snuck into numerous Kinko's around town and hogged their giant paper cutter for days and days! Kelly Paper also could do this for a nominal fee, but I was feeling cheap and decided to do it myself. In retrospect, they only charged $20 as a cutting fee, and I really should have just had them do it.. but oh well!
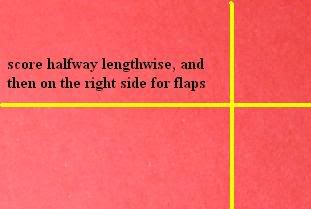
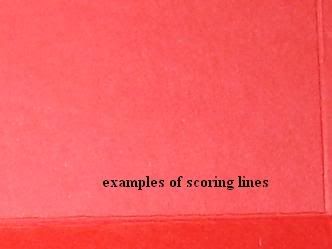
I then used the scoring blade on my paper trimmer and scored the paper in half lengthwise, and then 9.2cm from the right side for the flaps. Alternatively you can also use the ruler & bone folder to make the mark. This is just to make your fold cleaner and give you a guide on where to fold. I HIGHLY recommend this. If you take a thick coverweight piece of paper and fold it with and without scoring lines, you'll see the difference.
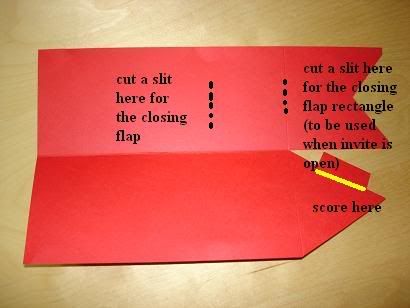
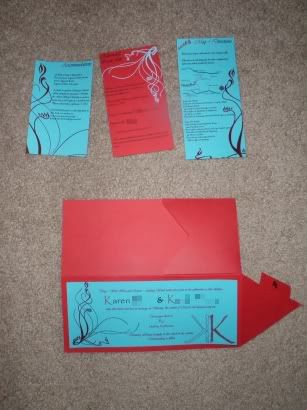
Then I made templates on how I wanted the pocket and closing flap to look like. These would be lined up against the right side (within the small area where we made the scoring line). We wanted the pocket that held the inserts to be an inverted triangle, and the closing flap to be another triangle that would both prop up the invitation as well as close the invitation (which is that extra rectangular piece on the blue template).
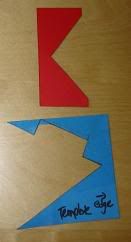
I traced the templates onto the red paper with a pencil, and cut!
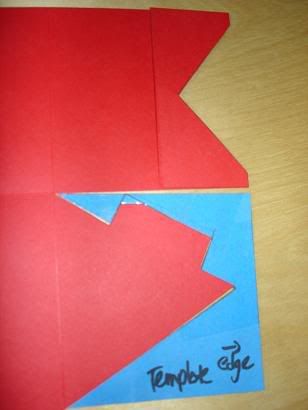
To yield this!
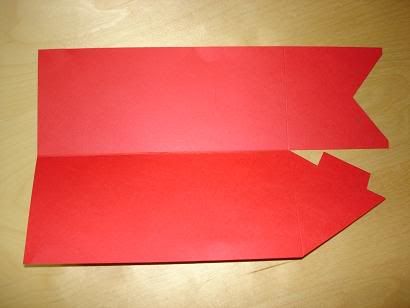
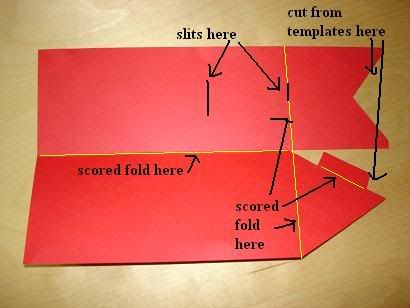
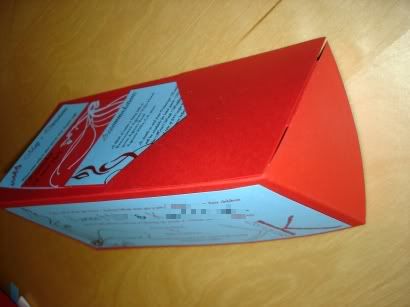
Then I folded the paper along the scoring lines, lengthwise and for each triangular piece. I also made an additional scoring line along the closing flap rectangle as that needed to be folded in. I also made two cuts with an X-acto knife to use as slots for inserting the closing flaps (this will make sense later). For this, I used the ruler as a cutting guide along with pencil marks to indicate where the cuts should be.
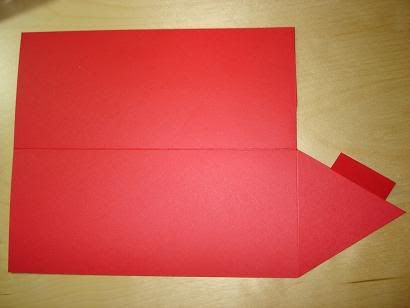
So at this point, this is what the pocketfold looked like:
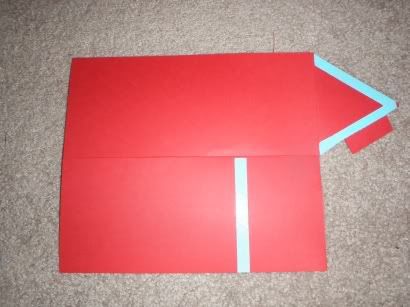
For the side with the inverted triangle cut out, I used the double-sided tape to tape it closed. (I actually was unable to find 1/8" thickness doublesided tape, so I just cut the 1/4" tape in half. I actually wouldn't recommend this tape.. it held just fine when we were working with it, but once we put the inserts in, they started popping open! I would perhaps recommend some sort of glue if you can get it precise enough.)
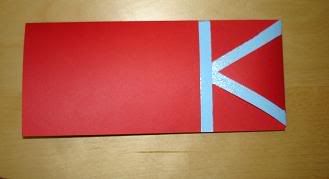
My friend made me an oversized K stamp, which I dipped into the watermark ink and embossed with blue powder.
I also drew a black arrow onto the closing flap rectangle so guests would understand that there was a purpose for it! (I also put pictures on the wedding website of the invitation propped up.) I glued on the main invitation and slipped in the inserts (more on how the inserts were made in the next tutorial).
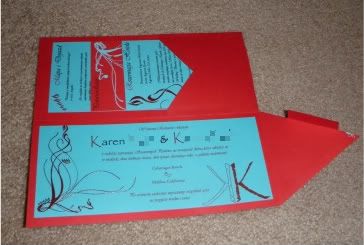
To close the invitation, you fold the invitation in half lengthwise, and then take the triangular flap sticking out and insert the top of the triangle into the slit we cut into the middle of the pocketfolder. And then you get a K! (Both me and my husband's first names start with a K.)
And when you open it and insert the flap, the invitation stands on its own!
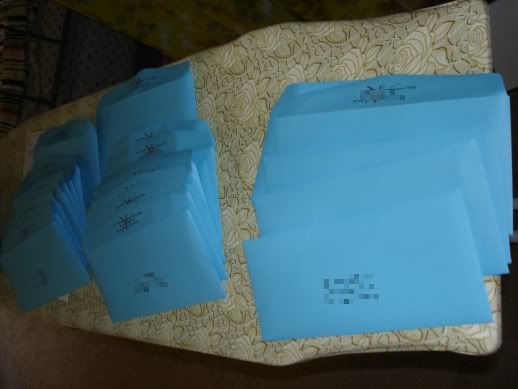
Then we printed the addresses on the blue envelopes and our return address on the back flap (no handwriting the addresses for this bride!) and off they went!
Credits:
- Bridesmaid CK for laser-cutting the K stamp for me (more details on the stamp making in the insert tutorial)
- Kelly Paper for their awesome paper, prices, and service
- Bride & Groom for designing the pocketfolds
- Michael's, JoAnn's, Paper Source, and Stampin' From the Heart (Culver City) for embossing demos and supplies (more details on the embossing in the insert tutorial)
No comments:
Post a Comment